
Got one image to resize? Easy! Got multiple images? When you add up the time it takes to resize 10, 100, 1000 or more, it is time consuming to repeat the same process one at a time. Learning how to resize multiple images in Photoshop is much faster and predictable.
This tutorial will show you how to speed up your workflow by creating custom Actions, with Automate and Batch function to resize multiple images in one go.
Actions is a Photoshop tool that records a task for the computer to remember. You can then Automate the same task on a single image or a Batch of images.
What you will need for this tutorial?
- PC or Mac Computer
- Adobe Photoshop
- Images
Part 1: How to setup your images and folders
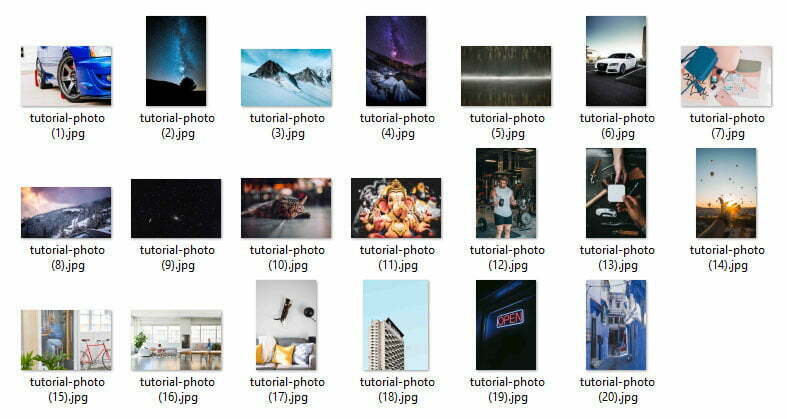
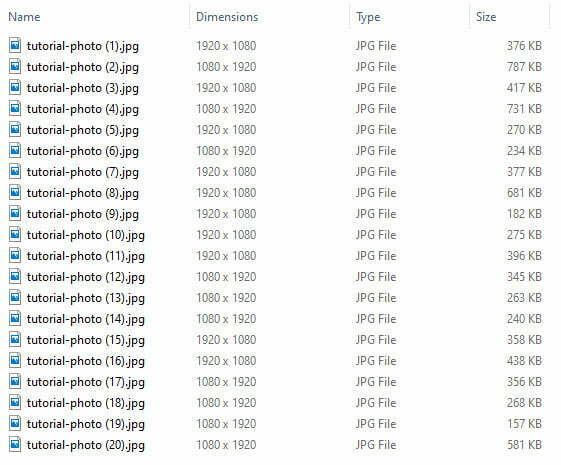
It is important to set up your images and folders correctly before running the automation process. For example, there are twenty images that need to be resized. There is a mix of landscape and portrait images, which means they need to be separated into different folders:
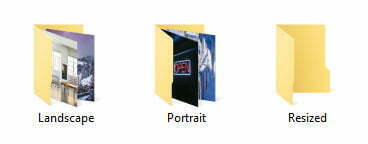
- Landscape (move your landscape images into this folder)
- Portrait (move your portrait images into this folder)
- Resized (leave this folder empty)
Part 2: How to set up Photoshop Actions
Open Photoshop and load one image from Landscape folder; and one image from Portrait folder. Start with the landscape image.
At the top navigation bar, go to Window > Actions.

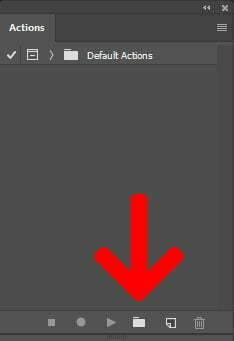
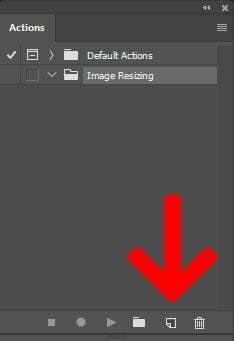
The Actions panel will display, then click on the icon to Create New Set.
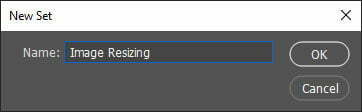
Type in a name for the New Set. For this tutorial, we will use 'Image Resizing', then click OK.
With the New Set created, click on the icon to Create New Action.
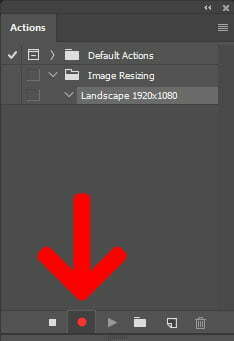
Type in a name for the New Action. For example, landscape images will resize to 1920 (width) x 1080 (height) pixels. Therefore, the action will be named, 'Landscape 1920x1080'. Then press Record.

Notice the 'red icon' where it was grey previously? This means your Action is on 'record' mode.
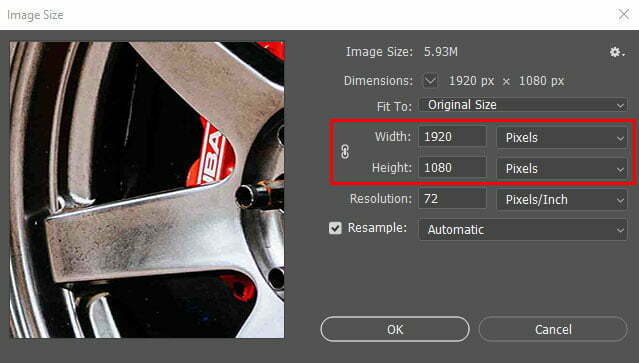
To resize the image, go to the top navigation bar and click Image > Image Size.

Change your width and height to your desired dimension. For this tutorial, the width will be 1920 pixels, and the height will be 1080 pixels. Once set, press OK.
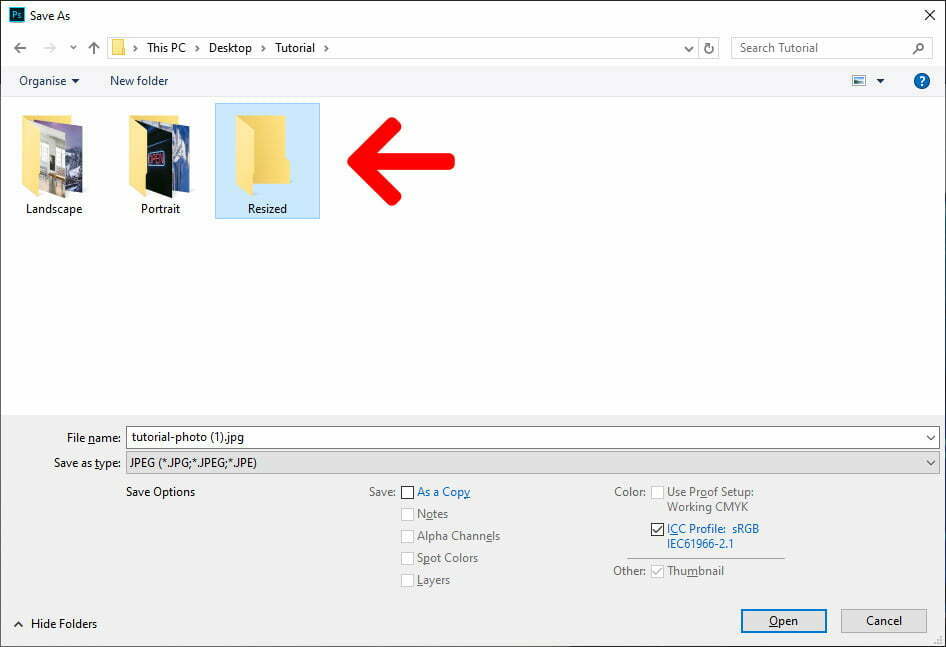
At the top navigation bar, go to File > Save As.
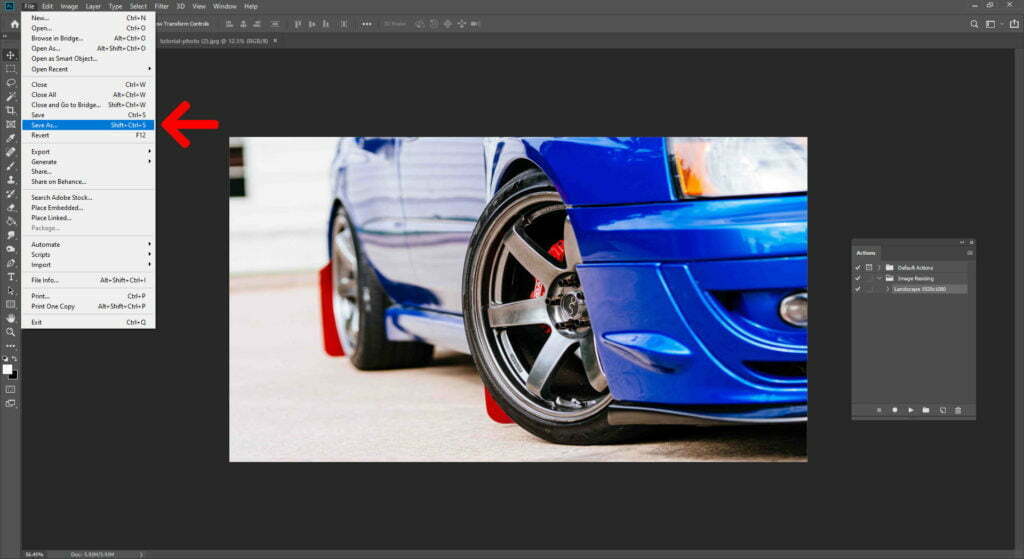
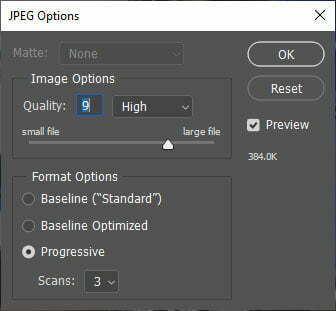
Save image into the 'Resized' folder to whichever file format you prefer. For example, JPEG format.
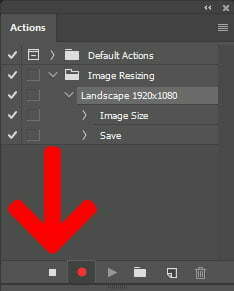
Once saved, click on the 'Stop' icon to finish recording your Action. Notice the computer has now recorded two tasks, (1) Image Size and (2) Save based on our parameters. This means if you work on a different image, you can press the 'Play' button (on the right side of the Record button) to execute that Action.
With landscape image Actions set up, you can now set up the Action for portrait images (if required). The steps are the same in Part 2, except you work with your portrait image in Photoshop, and change the width and height from your desired dimension. Save, then close all images in Photoshop.
Part 3: How to set up Automate and Batch
At the top navigation bar, go to File > Automate > Batch.

In the Batch panel, follow the instructions below:
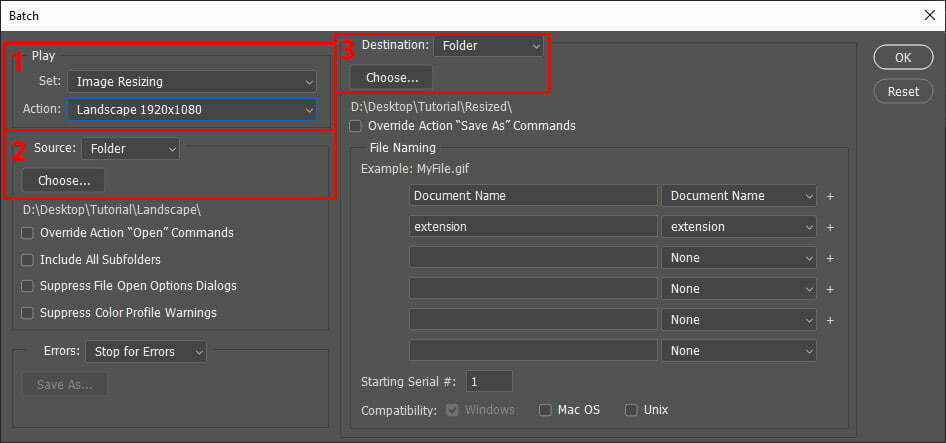
- Navigate to your Set and Action name that you created from this tutorial.
- In Source, choose Folder; then click Choose button and navigate to your 'Landscape' folder.
- In Destination, choose Folder; then click Choose button and navigate to the 'Resized' Folder.
- Click OK after completing the steps above.
Photoshop will now process all your images on screen. Do not close or click on anything while this is happening because you could disrupt the process. Leave the computer alone until Photoshop returns back to its normal state. Repeat the process for portrait images (if required).
Interesting Fact: Photoshop will 'never' tell you when the automation is complete and it's strange that Adobe has never made it obvious to the user since the function was released back in Adobe Photoshop 4.0 in 1996!
Go to Resized folder and the dimensions of each landscape and portrait image are now correctly adjusted.
Conclusion
With 20 images, using Actions took less than a minute for the computer to automate in comparison to manually resizing images one-by-one which could have taken a lot longer. Now that you have learned how to resize multiple images on photoshop, you can get creative by automating all sorts of tasks using the Actions tool. Enjoy!
That’s the end of the tutorial. If you found this useful, like and share this page. It helps us a lot, and let us know on the comments section if you would like to see more of these tutorials. Feel free to request topics on Photoshop and I will see you on the next tutorial.
Images used in this tutorial was sourced from Unsplash for educational purposes only.